
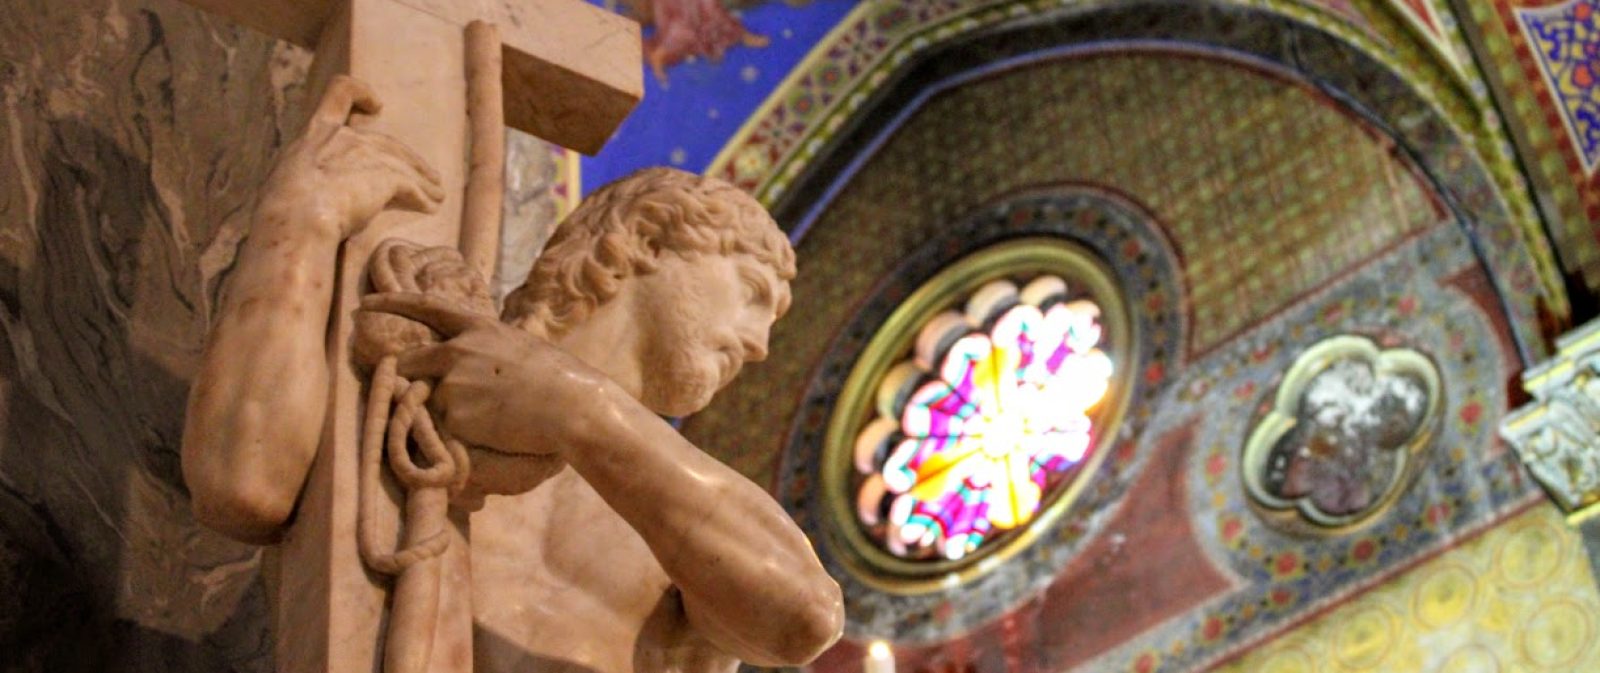
Volta della Cappella Sistina: come trasferivo i miei disegni sull’intonaco
Prima che una figura potesse prendere vita sulla volta della Cappella Sistina, dovevo immaginarla, studiarla e trovare il modo di trasferirla sulla superficie ancora da dipingere. Il disegno era il primo passo, ma non esisteva un unico sistema per portarlo dalla carta all’intonaco: a seconda della figura, della composizione e del momento dei lavori ricorrevo al cartone, allo spolvero, all’incisione oppure al disegno diretto sulla superficie.
Avevo davanti a me una volta enorme e irregolare, molto diversa dal foglio sul quale avevo studiato le mie figure. Per questo il rapporto fra il disegno preparatorio e l’affresco non poteva essere sempre identico. Alcune immagini richiedevano una preparazione minuziosa, altre dovevano essere verificate direttamente sull’intonaco, lasciando aperta la possibilità di modificarne proporzioni, posizione e dettagli durante la pittura.
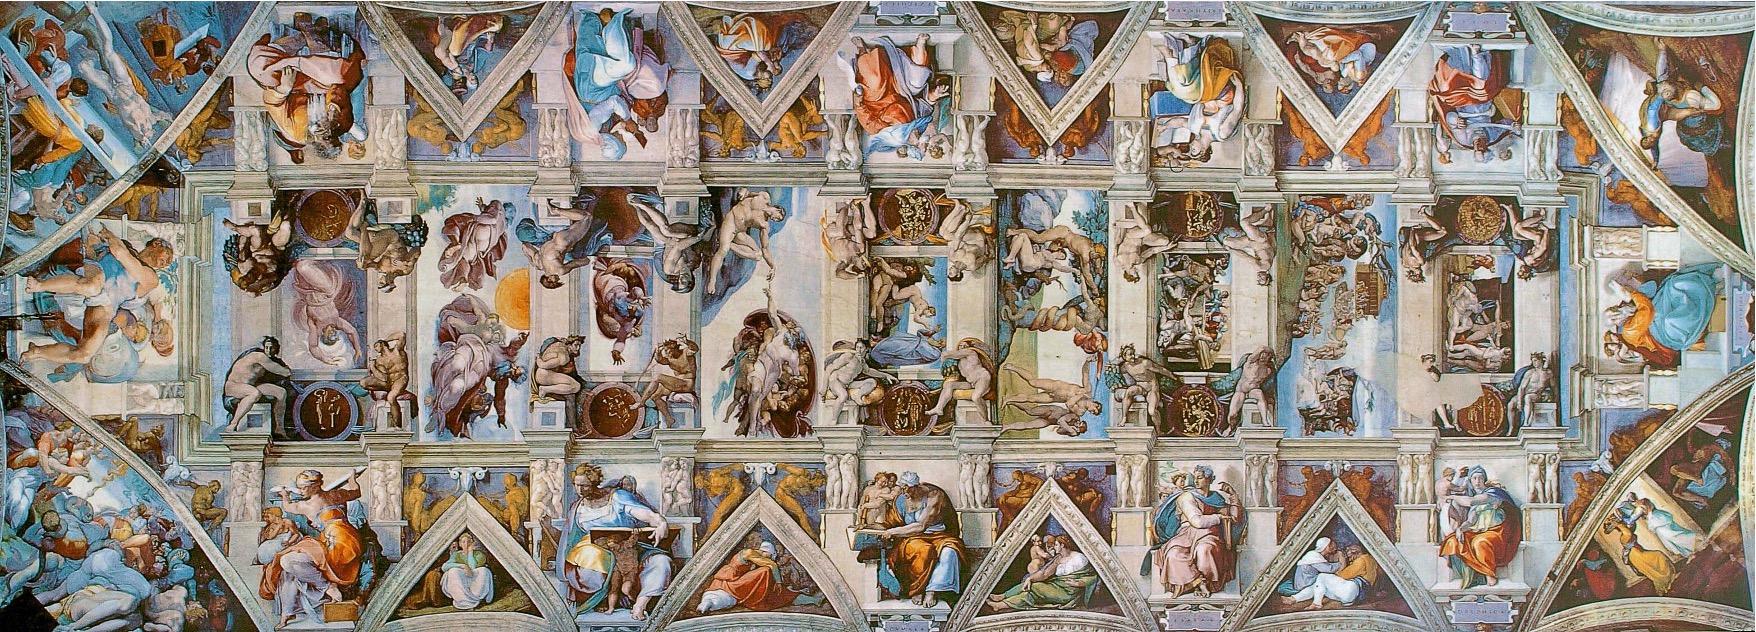
È proprio attraverso le tracce ancora leggibili sulla superficie della volta che oggi è possibile ricostruire il mio modo di lavorare: i piccoli fori dei chiodi, i punti lasciati dallo spolvero, le incisioni e le linee tracciate direttamente nell’intonaco raccontano parte della storia della Cappella Sistina che normalmente non si vede.
Il cartone era il punto di partenza
La carta, nel mio tempo, aveva un costo tutt’altro che trascurabile e non poteva essere utilizzata con leggerezza. Eppure, per gran parte delle figure della volta, preparai dei cartoni destinati a trasferire sull’intonaco le composizioni che avevo studiato sulla carta, ricorrendo a questo procedimento non soltanto per molte delle grandi figure, ma anche per le cornici con ghiande e conchiglie delle vele e per i primi tratti, capitelli compresi, della cornice soprastante i troni dei Veggenti.
Il cartone mi consentiva di controllare con precisione la costruzione dell’immagine prima del colore, ma non significava che tutto dovesse rimanere immutato. La superficie della volta era curva, irregolare e difficile da leggere dal basso e, una volta trasferito il disegno, potevano emergere problemi che sulla carta non erano altrettanto evidenti.
Per questo il rapporto fra il disegno preparatorio e l’affresco non fu mai completamente meccanico: talvolta trasferivo una composizione già definita con grande precisione, mentre in altri casi utilizzavo il disegno soltanto come punto di partenza, lasciando alla fase pittorica la possibilità di apportare modifiche.
Lo spolvero, il metodo che lasciava una traccia di punti
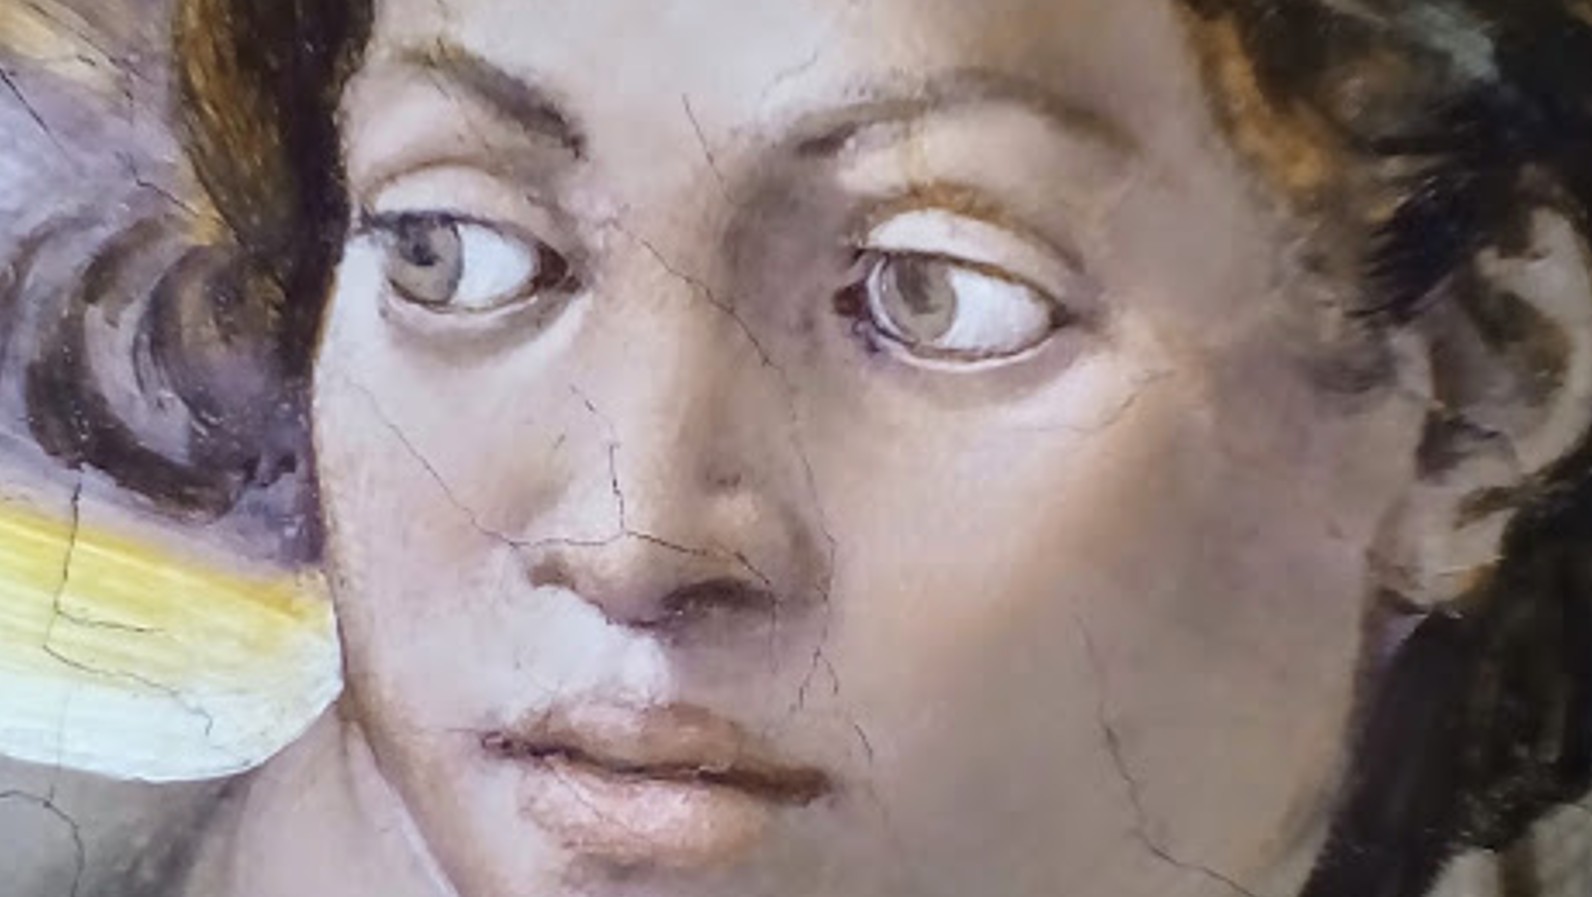
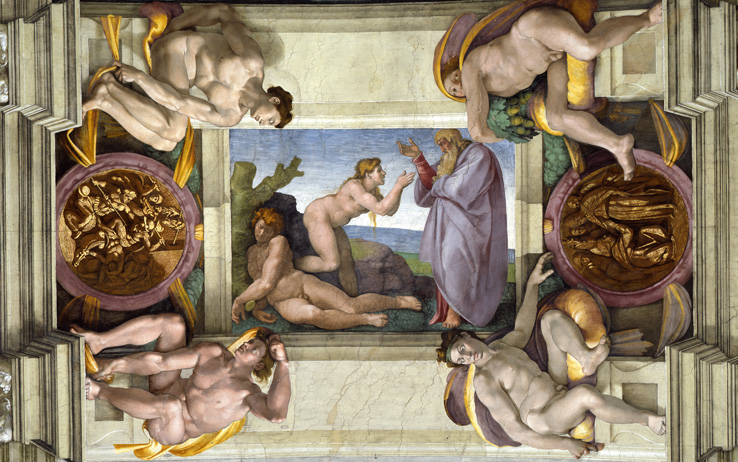
Nella prima metà della volta, fino alla Creazione di Eva compresa, lo spolvero fu il sistema di trasferimento che preferii per la maggior parte delle figure. Preparavo il cartone perforando con grande attenzione il contorno delle immagini e poi lo fissavo all’intonaco con dei chiodi, così che la polvere potesse attraversare i piccoli fori e lasciare sulla superficie una successione di punti corrispondenti al disegno.
Quando il cartone veniva rimosso, sull’intonaco rimaneva la traccia della figura, pronta per essere ripresa e trasformata in pittura. Le tracce di questo procedimento sono ancora leggibili grazie alla stesura molto acquerellata del colore, che permette di vedere al di sotto la superficie alcuni dei segni utilizzati durante la preparazione.
Per le immagini della prima metà della volta avevo preparato cartoni assai rifiniti, perforando i contorni con una precisione quasi maniacale: quelle figure dovevano arrivare sull’intonaco già perfettamente studiate nella loro struttura.
Quando il disegno non era ancora definitivo
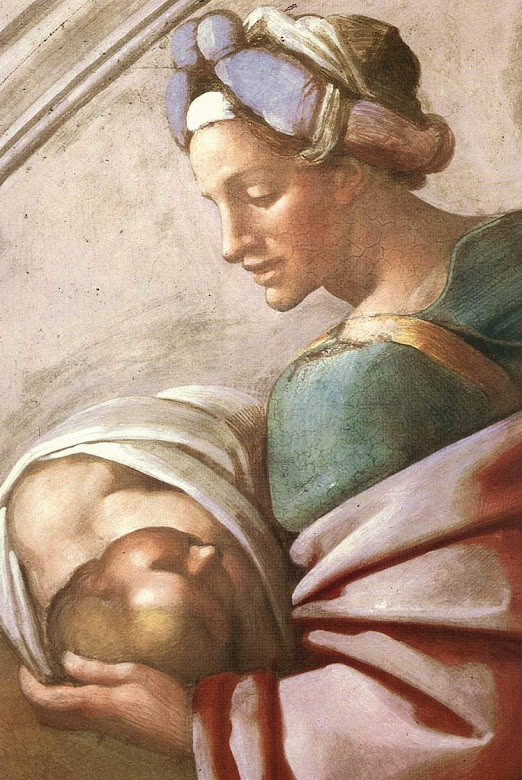
Esistono però delle eccezioni, soprattutto per la figura di Oloferne e per l’angelo della Cacciata dal Paradiso terrestre.
In entrambi i casi le tracce lasciate sull’intonaco indicano che il disegno preparatorio era molto più sommario. Entrambe le immagini, pur trovandosi in secondo piano, svolgono una funzione essenziale nell’equilibrio narrativo e compositivo della scena.
Nel caso di Oloferne, un disegno conservato al Teylers Museum di Haarlem documenta una prima soluzione completamente diversa da quella che poi adottai nella pittura: il corpo del condottiero ucciso era pensato in una posizione quasi perpendicolare rispetto al piano visivo, mentre nella versione definitiva lo trasformai in una figura fortemente scorciata e disposta orizzontalmente.
Anche nella Cacciata la soluzione cambiò durante il percorso. L’angelo era stato inizialmente concepito più piccolo e maggiormente scorciato, mentre nella versione dipinta lo ingrandii e lo portai più vicino al primo piano, così da stabilire un rapporto più equilibrato con il demonio e creare fra le due figure un collegamento visivo capace di unire i diversi settori della composizione.

L’incisione mi permetteva di lavorare più rapidamente
Nella seconda metà della volta, a partire dalla Creazione dell’Uomo, l’incisione indiretta divenne molto più frequente e la adoperai nei riquadri con le scene della Genesi, nelle vele e nelle coppie di putti dei rilievi dei troni dei Veggenti.
Rispetto allo spolvero, questo sistema permetteva di trasferire il disegno in un tempo più breve. Con il procedere dei lavori il tempo era diventato un elemento sempre più importante. Sapevo di averne poco a disposizione e papa Giulio II insisteva per vedere la volta ultimata.
Dopo la ripresa dei lavori nel settembre del 1511, l’accelerazione dell’esecuzione è resa evidente anche nell’organizzazione delle giornate, più ampie e meno numerose.
Il confronto fra le tracce dell’incisione e quelle dello spolvero mostra che, nella seconda metà della volta, il disegno preparatorio era spesso più rapido e sommario, soprattutto nelle parti secondarie e nei piani arretrati, dove potevo risolvere molti dettagli direttamente durante la pittura.
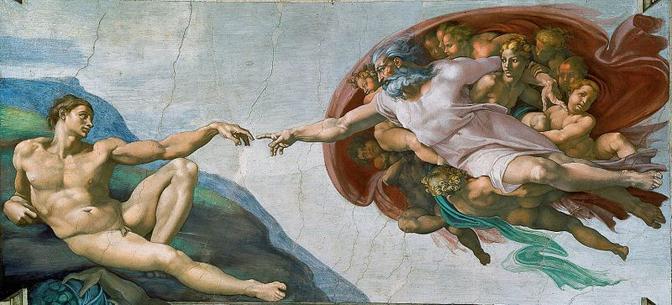
La Creazione di Adamo mostra due modi diversi di lavorare
La Creazione dell’Uomo rappresenta invece, all’interno della stessa composizione, due differenti modalità di trasferimento.
Per il gruppo dell’Eterno e per le figure che gli fanno corona utilizzai lo spolvero, lasciando tracce che testimoniano la preparazione di un cartone estremamente accurato, nel quale avevo già previsto quasi ogni elemento della composizione.
Per Adamo, invece, ricorsi all’incisione indiretta e il disegno preparatorio appare molto più rapido, quasi schizzato. La versione finale presenta alcune modifiche rispetto al progetto iniziale: ingrandii leggermente la figura e la posizione della gamba destra, in origine più flessa, la cambiai per ottenere una distensione differente.
Con l’incisione avevo la possibilità di verificare direttamente sulla volta la posizione e le proporzioni della figura e la libertà di cambiare qualche dettaglio in più.
La Punizione di Aman
Un procedimento simile si trova nella vela della Punizione di Aman. Lì trasferii il disegno con lo spolvero in una parte della composizione e con l’incisione nell’altra.
La figura di Aman, fortemente scorciata, rappresentava un problema complesso dal punto di vista prospettico. I disegni conservati a Londra e ad Haarlem, insieme al frammento di cartone conservato al Teylers Museum, mostrano quanto a lungo cercai una soluzione convincente per l’assetto della figura.
In questo caso l’abbandono dello spolvero a favore dell’incisione anche alla volontà di verificare direttamente sull’intonaco il risultato del disegno prima di ultimarlo.

Non tutto ciò che vedete sulla volta era stato preparato su un cartone
Non preparai un cartone per ogni elemento della decorazione.
I rari paesaggi delle scene centrali e delle vele spesso li abbozzavo direttamente sull’affresco, mentre gli elementi architettonici li tracciavo direttamente sull’intonaco con l’utilizzo di regoli, fili e chiodi.
La struttura della volta era troppo irregolare perché potessi limitarmi a trasferire un disegno preparato su una superficie piana. Dovevo costruire le linee architettoniche direttamente sul posto, verificandole e correggendole in rapporto alla superficie reale.
Le incisioni delle cornici, degli archi, dei podi degli Ignudi e dei troni dei Veggenti sono parte integrante della costruzione della volta, non una traccia preparatoria secondaria.

I chiodi raccontano ciò che il colore nasconde
Ancora oggi alcuni fori permettono di distinguere i chiodi utilizzati per fissare i cartoni da quelli impiegati per costruire l’impianto architettonico.
Questi ultimi lasciavano nell’intonaco fori più piccoli e potevano essere utilizzati insieme a fili e regoli per stabilire le linee principali della composizione. Alcuni chiodi di dimensioni maggiori sono ancora visibili in corrispondenza degli apici delle vele e lungo le cornici, dove servivano a definire l’impostazione generale dell’apparato architettonico.
Sono dettagli quasi invisibili a chi guarda la volta dal pavimento della Cappella Sistina, ma proprio questi piccoli segni permettono oggi di ricostruire concretamente le diverse fasi del lavoro.

Alcune figure nacquero direttamente sull’intonaco
L’assenza delle tracce dello spolvero, dell’incisione e dei fori dei chiodi permette di individuare le parti che furono dipinte senza l’ausilio di un cartone.
Fra queste rientrano le figure degli Antenati nelle lunette, i Nudi bronzei sopra le vele, i Putti reggitarga dei pennacchi e i Medaglioni monocromi, oltre a numerosi elementi secondari che completano le grandi composizioni.
Nel Diluvio, per esempio, alcune figurette dell’ultima giornata furono aggiunte direttamente durante la pittura; nella Tentazione comparvero la donna-demonio e l’albero del peccato, mentre nelle vele di Ozias, Ara e Jesse furono inseriti altri elementi non necessariamente previsti dal progetto iniziale.
Queste aggiunte dimostrano quanto il processo fosse dinamico e quanto la pittura potesse modificare il progetto iniziale.
Dopo il disegno arrivava il momento più difficile: dipingere
Una volta trasferito il disegno attraverso lo spolvero o l’incisione, ripassavo il contorno delle figure in nero a pennello, per rendere immediatamente riconoscibile la sagoma che dovevo dipingere.
Nel corso della stesura cromatica potevo coprirle quando volevo ottenere una modellazione più morbida, mentre in altri punti le lasciavo emergere per rendere più netto un particolare.
Quando avevo utilizzato lo spolvero, riprendevo alcune linee con incisioni dirette nell’intonaco, soprattutto nei panneggi e più raramente negli incarnati, mentre evitavo generalmente di incidere i volti.
Per le figure che non avevano un cartone preparatorio, invece, bastava spesso un disegno preliminare molto sommario, destinato soprattutto a stabilire la sagoma generale dell’immagine.

Il buon fresco trasformava il disegno in pittura
Dopo la preparazione arrivava il colore e, salvo una breve fase iniziale nel Diluvio, la tecnica che utilizzai fu quella del più puro buon fresco.
Dipingere a fresco significava lavorare sull’intonaco ancora umido, così che i pigmenti potessero integrarsi nella superficie mentre questa asciugava. Il tempo diventava quindi parte stessa del lavoro: ogni giornata doveva essere organizzata in modo da completare la porzione di intonaco preparata prima che perdesse le condizioni necessarie alla pittura.
È anche per questo che la dimensione delle giornate permette oggi di comprendere il ritmo con cui procedetti sulla volta.
Nella seconda metà della decorazione, per gli Ignudi e i Veggenti continuai a utilizzare lo spolvero proprio perché si trattava di immagini nelle quali la precisione formale richiedeva una preparazione particolarmente accurata.
La volta conserva ancora oggi le tracce del mio lavoro
La volta della Cappella Sistina, a distanza di secoli, racconta il mio lavoro con le tracce all’epoca lasciati. I cartoni preparatori, i punti dello spolvero, le incisioni, i fori dei chiodi, le linee tracciate con regoli e fili e le correzioni intervenute durante l’esecuzione.
La volta racconta così due storie contemporaneamente.
La prima è quella che tutti conoscono: la Genesi, Adamo ed Eva, i Profeti, le Sibille, gli Ignudi e l’intero universo di immagini che domina lo spazio della Cappella Sistina.
La seconda è una storia più silenziosa, fatta di segni quasi invisibili e di decisioni prese durante il lavoro, quando il disegno sulla carta doveva confrontarsi con la realtà dell’intonaco.
Per il momento il sempre vostro Michelangelo Buonarroti vi saluta dandovi appuntamento ai prossimi post e sui social.
The Sistine Chapel Ceiling: How I Transferred My Drawings onto the Plaster
Before a figure could come to life on the Sistine Chapel ceiling, I had to imagine it, study it, and find a way to transfer it onto the surface awaiting paint. Drawing was the first step, but there was no single method for moving the image from paper to plaster; depending on the figure, the composition, and the stage of the work, I employed full-scale cartoons, pouncing, incising, or drawing directly onto the surface.
I faced a vast, irregular vault—very different from the sheets of paper where I had studied my figures. Consequently, the relationship between the preparatory drawing and the fresco could not always be the same. Some images required meticulous preparation, while others needed to be tested directly on the plaster, allowing for adjustments to proportions, positioning, and details as the painting progressed.
It is precisely through the traces still visible on the ceiling’s surface that my working methods can be reconstructed today: the tiny nail holes, the dots left by pouncing, the incised lines, and the marks drawn directly into the plaster all tell a part of the Sistine Chapel’s story that usually goes unseen.
The Cartoon Was the Starting Point
In my time, paper was far from cheap and could not be used casually. Yet, for the majority of the figures on the ceiling, I prepared full-scale cartoons to transfer the compositions I had studied on paper onto the plaster. I used this process not only for many of the large figures but also for the acorn- and shell-adorned frames of the triangular spandrels, and for the initial outlines—capitals included—of the molding above the thrones of the Seers. The cartoon allowed me to precisely control the composition of the image before applying color, but that did not mean everything had to remain unchanged. The surface of the vault was curved, irregular, and difficult to read from below; once the design was transferred, issues could arise that were not as apparent on paper.
For this reason, the relationship between the preparatory drawing and the fresco was never entirely mechanical: at times, I transferred a composition that was already defined with great precision, while in other cases, I used the drawing merely as a starting point, leaving room for modifications during the painting phase.
Spolvero: the method that left a trail of dots
For the first half of the vault—up to and including the Creation of Eve—spolvero (pouncing) was the transfer method I preferred for most of the figures. I would prepare the cartoon by carefully pricking the outlines of the images and then pinning it to the plaster; this allowed the dust to pass through the tiny holes and leave a series of dots on the surface corresponding to the design.
Once the cartoon was removed, the outline of the figure remained on the plaster, ready to be worked up into a painting. Traces of this process are still visible today thanks to the highly diluted, watercolor-like application of the paint, which allows some of the marks made during the preparatory stage to be seen beneath the surface.
For the images in the first half of the vault, I had prepared highly finished cartoons, pricking the outlines with almost obsessive precision; those figures had to reach the plaster with their structural composition already fully resolved.
When the design was not yet final
There are exceptions, however—most notably the figure of Holofernes and the angel in the Expulsion from the Garden of Eden. In both cases, the traces left on the plaster indicate that the preparatory drawing was far more rudimentary. Although situated in the background, both images play an essential role in the scene’s narrative and compositional balance.
In the case of Holofernes, a drawing held at the Teylers Museum in Haarlem documents an initial solution completely different from the one I ultimately adopted in the painting: the slain commander’s body was originally conceived in a position almost perpendicular to the picture plane, whereas in the final version I transformed it into a figure that was heavily foreshortened and arranged horizontally.
The approach to The Expulsion also changed during the process. The angel was initially conceived as smaller and more sharply foreshortened; in the painted version, however, I enlarged the figure and brought it closer to the foreground to establish a more balanced relationship with the demon and create a visual link between the two figures capable of uniting the composition’s various sections.
Incising allowed me to work more quickly
In the second half of the vault, starting with The Creation of Man, indirect incising became much more frequent; I employed it in the Genesis panels, the spandrels, and the pairs of putti in the reliefs on the Seers’ thrones.
Compared to the pouncing method, this system allowed the design to be transferred more quickly. As the work progressed, time had become an increasingly critical factor; I knew I had little of it left, and Pope Julius II was insisting on seeing the vault completed.
After work resumed in September 1511, the accelerated pace of execution is also evident in the organization of the giornate—the daily work sections—which became larger and fewer in number.
A comparison between the traces left by incised lines and those from pouncing reveals that, in the second half of the vault, the preparatory drawing was often quicker and more summary—especially in secondary areas and background planes, where I could resolve many details directly while painting.
The Creation of Adam demonstrates two different working methods
The Creation of Man, meanwhile, displays two different transfer techniques within a single composition.
For the group of the Almighty and the figures surrounding Him, I used pouncing; the resulting traces bear witness to the preparation of a highly detailed cartoon in which I had already mapped out almost every element of the composition.
For Adam, however, I resorted to indirect incision, and the preparatory drawing appears much more rapid—almost like a sketch. The final version incorporates changes from the initial plan: I slightly enlarged the figure and altered the position of the right leg—originally more bent—to achieve a different kind of extension.
Using incision gave me the chance to check the figure’s position and proportions directly on the vault, as well as the freedom to modify a few more details.
The Punishment of Haman
A similar process can be found in the spandrel depicting the Punishment of Haman. There, I transferred the design using pouncing for one part of the composition and incision for the other. The figure of Haman, depicted in extreme foreshortening, posed a complex challenge in terms of perspective. The drawings held in London and Haarlem, along with the cartoon fragment at the Teylers Museum, reveal the extensive effort I put into finding a convincing pose for the figure.
In this instance, I abandoned the pouncing method in favor of incised lines, as I wanted to verify the drawing’s effect directly on the plaster before finalizing it.
Not everything you see on the vault was prepared on a cartoon; I did not create a cartoon for every single decorative element.
I often sketched the rare landscapes in the central scenes and the triangular spandrels directly onto the fresh plaster, while I laid out the architectural elements straight onto the surface using straightedges, strings, and nails.
The vault’s structure was too irregular for me to simply transfer a design prepared on a flat surface. I had to construct the architectural lines on-site, checking and adjusting them against the actual surface.
The incised lines marking the cornices, arches, the Ignudi pedestals, and the thrones of the Seers are integral to the vault’s construction, not merely secondary preparatory marks.
The nails reveal what the paint conceals
Even today, certain holes allow us to distinguish between the nails used to secure the cartoons and those employed to lay out the architectural framework.
The latter left smaller holes in the plaster and could be used in conjunction with strings and straightedges to establish the composition’s main lines. Larger nails are still visible at the apexes of the spandrels and along the cornices, where they served to define the overall layout of the architectural scheme. These details are almost invisible to anyone looking up at the vault from the floor of the Sistine Chapel, yet it is precisely these small marks that allow us today to concretely reconstruct the various stages of the work.
Some figures were created directly on the plaster
The absence of traces from pouncing, incised lines, or nail holes makes it possible to identify the sections painted without the aid of a cartoon.
These include the figures of the Ancestors in the lunettes, the bronze-colored nudes above the triangular spandrels, the putti holding plaques on the pendentives, and the monochrome medallions, as well as numerous secondary elements that complete the large-scale compositions.
In The Flood, for instance, certain small figures from the final day of work were added directly during the painting process; in The Temptation, the female demon and the Tree of Sin appeared, while other elements—not necessarily part of the original plan—were inserted into the spandrels depicting Uzziah, Asa, and Jesse.
These additions demonstrate just how dynamic the process was and the extent to which the act of painting could alter the initial design.
After the drawing came the most difficult part: the painting
Once the design had been transferred via pouncing or incision, I would trace the outlines of the figures in black brush, to make the outline I needed to paint immediately recognizable.
While applying the color, I could cover them up when I wanted softer modeling, whereas in other areas I let them show through to sharpen a specific detail.
When I had used the pouncing method, I would reinforce certain lines by incising directly into the plaster—especially in the drapery and, more rarely, in the flesh tones—while generally avoiding incising the faces.
For figures that lacked a preparatory cartoon, however, a very rough preliminary sketch often sufficed, intended primarily to establish the image’s general outline.
Buon fresco transformed the drawing into painting
After the preparation came the color; except for a brief initial phase during the Flood, the technique I employed was that of pure buon fresco.
Painting a fresco meant working on plaster that was still damp, allowing the pigments to integrate into the surface as it dried. Time thus became an integral part of the work itself: each day’s session had to be organized to complete the prepared section of plaster before it lost the conditions necessary for painting.
This is also why the size of the daily sections allows us today to understand the pace at which I proceeded across the vault.
During the second half of the decorative work, I continued using pouncing for the Ignudi and the Seers, precisely because these images required a particularly meticulous level of formal precision.
The vault still bears traces of my work today
Centuries later, the vault of the Sistine Chapel still tells the story of my work through the traces left at the time: the preparatory cartoons, pouncing marks, incisions, nail holes, lines drawn with straightedges and strings, and corrections made during execution.
In this way, the vault tells two stories simultaneously. The first is the one everyone knows: Genesis, Adam and Eve, the Prophets, the Sibyls, the Ignudi, and the entire universe of images that dominates the space of the Sistine Chapel.
The second is a quieter story, made up of almost invisible marks and decisions taken during the work itself, when the drawing on paper had to contend with the reality of the plaster.
For now, your ever-faithful Michelangelo Buonarroti bids you farewell, looking forward to seeing you in future posts and on social media.
Sostienici – Support Us
Se questo blog ti piace e ti appassiona, puoi aiutarci a farlo crescere sempre più sostenendoci in modo concreto condividendo i post, seguendo le pagine social e con un contributo che ci aiuta ad andare avanti con il nostro lavoro di divulgazione. . ENGLISH: If you like and are passionate about this blog, you can help us make it grow more and more by supporting us in a concrete way by sharing posts, following social pages and with a contribution that helps us to move forward with our dissemination work.
10,00 €
-
La Cacciata dei mercanti dal Tempio: quel disegno che forse nasconde un progetto incompiuto
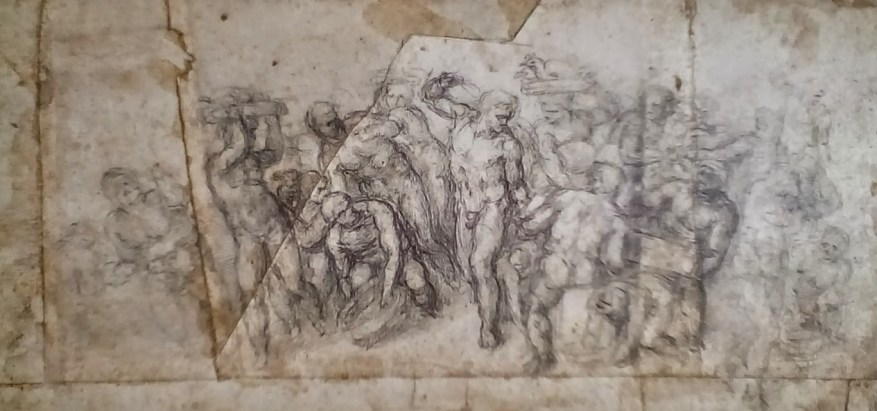
🇮🇹Vi porto davanti al mio disegno della Cacciata dei mercanti dal Tempio, conservato al British Museum. Guardate il braccio destro di Cristo: la forza del suo gesto vi ricorda qualcosa? 🇮🇹 I am bringing you before my drawing of the Expulsion of the Money Changers from the Temple, held at the British Museum. Look at…
-
A Pompei ci sono 50 gatti che vivono tra le rovine antiche: ora la loro storia diventa un libro
A Pompei i gatti sono diventati celebri sui social. Ora il libro Gatti di Pompei racconta, con foto e storie, la loro vita tra le antiche rovine romane.
-
Il Louvre rischia la chiusura? Ecco cosa sta succedendo al museo dopo il furto da 88 milioni
🇮🇹Il Louvre rischia di chiudere senza una grande ristrutturazione. Dopo il furto dei gioielli della Corona, il direttore Christophe Leribault lancia l’allarme… 🇬🇧The Louvre risks closure without a major renovation. Following the theft of the Crown Jewels, director Christophe Leribault has raised the alarm…
Condividi:


Questo sono io



sostienici

Sostienici – Support Us
Se questo blog ti piace e ti appassiona, puoi aiutarci a farlo crescere sempre più sostenendoci in modo concreto condividendo i post, seguendo le pagine social e con un contributo che ci aiuta ad andare avanti con il nostro lavoro di divulgazione. . ENGLISH: If you like and are passionate about this blog, you can help us make it grow more and more by supporting us in a concrete way by sharing posts, following social pages and with a contribution that helps us to move forward with our dissemination work.
€10,00


